Once you have completed the basic Bill Pay Setup and set up at least some of your Vendors, you’re now ready to use the [me] Bill Pay!
This article covers:
If you would rather watch a video, please check these out:
Pay a Bill
1. Click on Bill Pay > Invoices
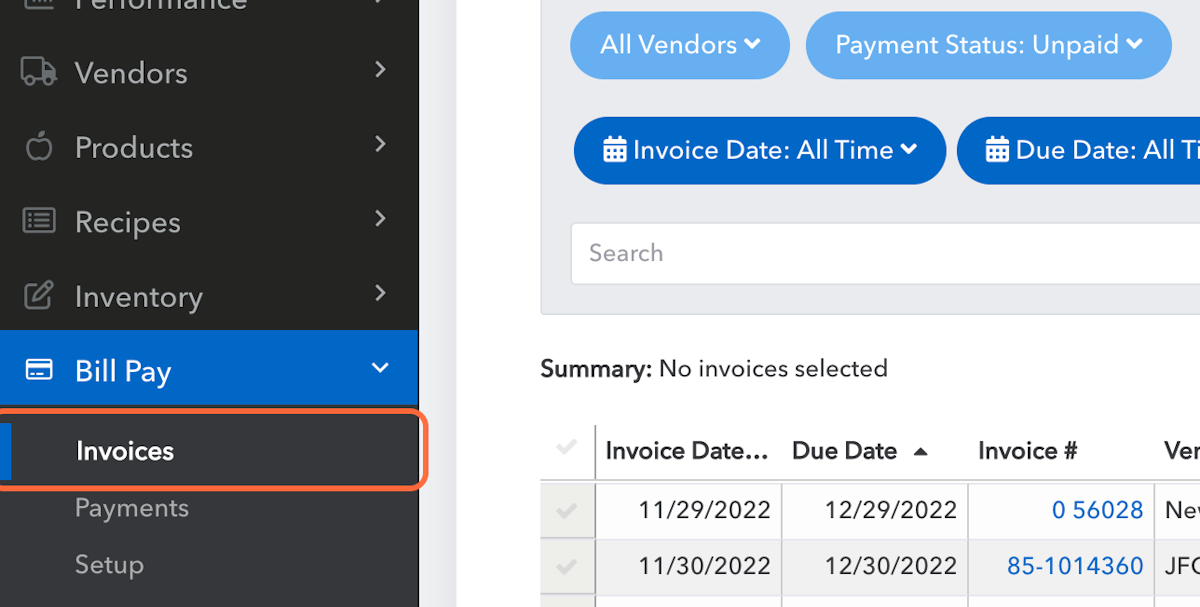
You have lots of options for viewing your invoices, but by default, this screen only displays unpaid invoices. View the invoice image by clicking on the Invoice number.
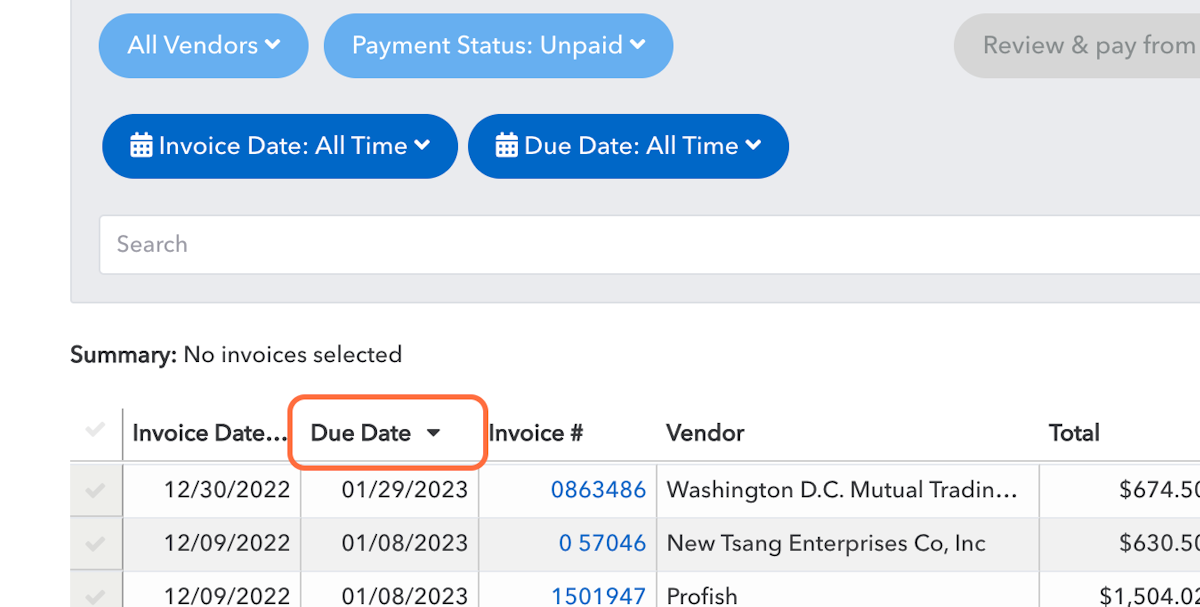
Search filters are available using the drop down buttons and by entering key words into the search bar. Clicking on the column headers, as shown, will sort them first in ascending order and then descending order if you click again.
2. Select as many invoices as you want to schedule. The “Summary” displayed will update live with the total payment value.
If you have filtered down to just what you need, you can also click the top checkmark to select all invoices displayed.
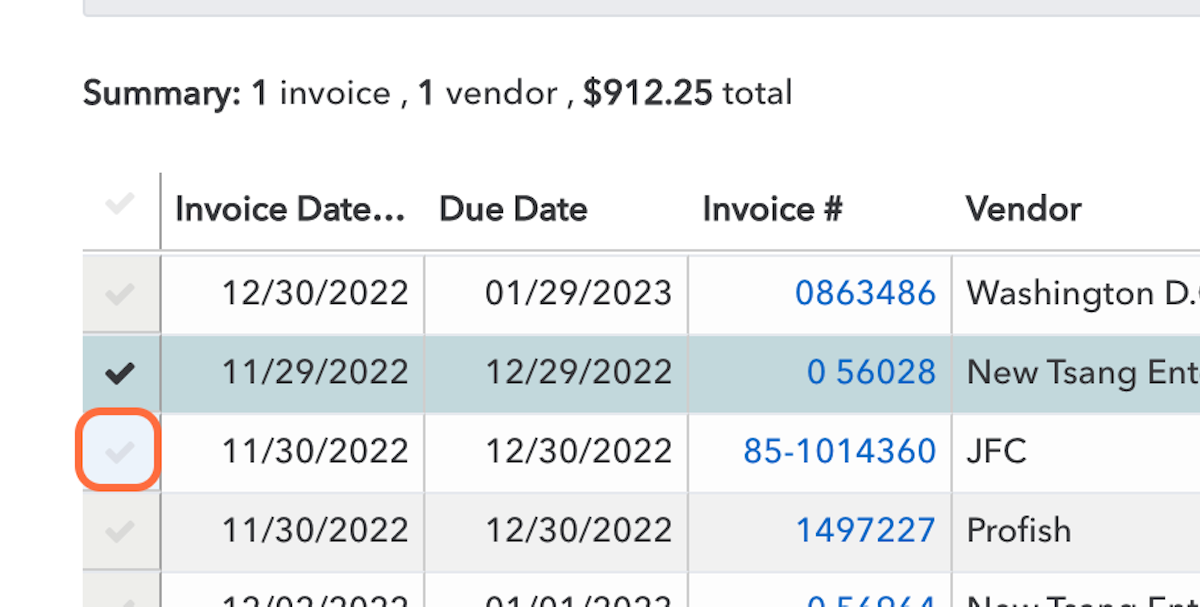
If you have credits from this vendor, you may also select them at this time and they will deduct from the total. Just make sure the check total doesn't dip below zero, otherwise you'll have to save the credit and apply it to a larger invoice -- a check for a negative amount won't do anyone any good!
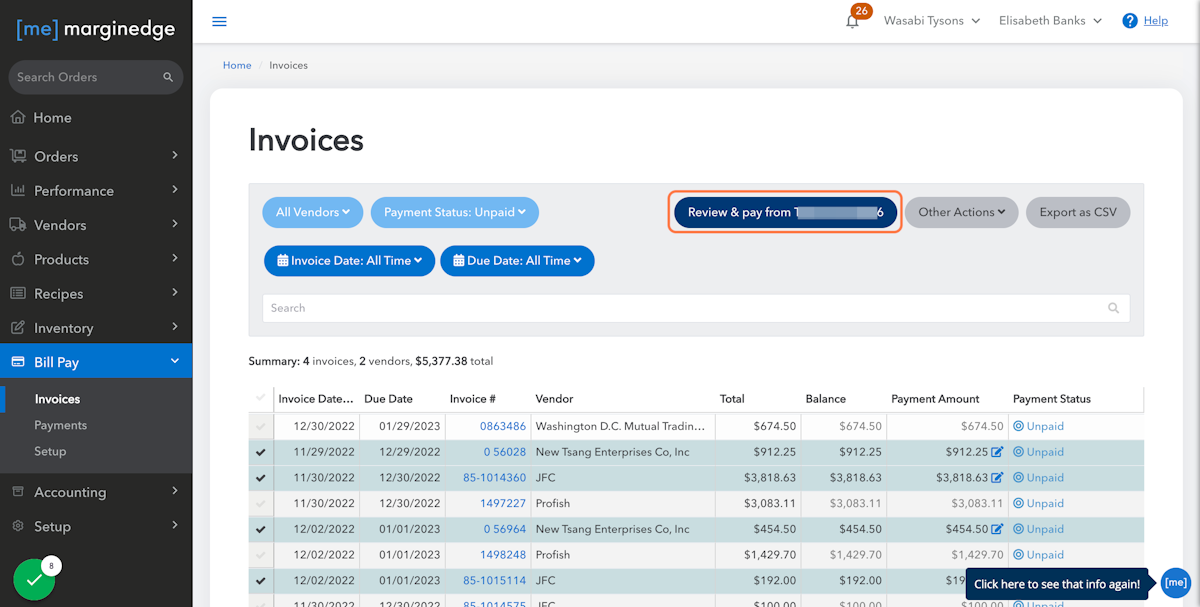
3. Once you have selected all the invoices you want to pay, click on "Review & pay".
If you have more than one bank account set up, you will see the option to chose which one you would like to use.
4. A confirmation box will pop up. From here, you can adjust the date, the memo and learn expected arrival dates.
-
The send date defaults to the soonest possible processing date. If this is correct, you don't need to edit any dates.
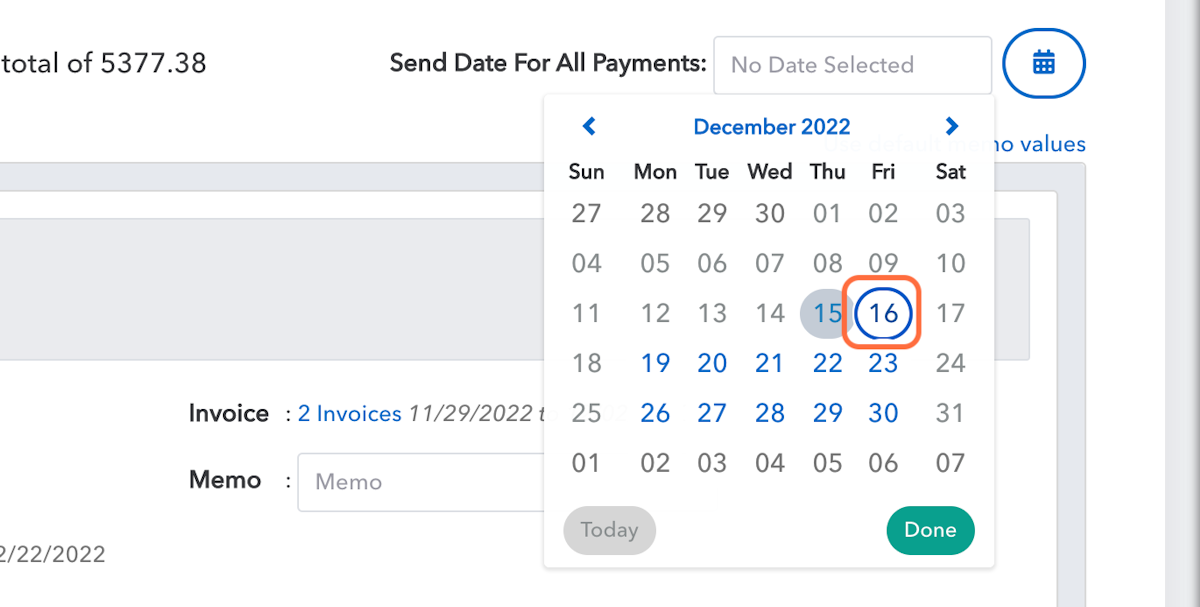
- To adjust all dates for all payments in this batch, set the "Send Date For All Payments" found up top.
Use the date selector box to choose your send date.
-
-
You can also edit the Send Date on any individual payment. We will show you a best guess of arrival date.
See this article if you're curious about transit times: When Will My Vendor Receive Their Payment?
-
You can also edit the Send Date on any individual payment. We will show you a best guess of arrival date.
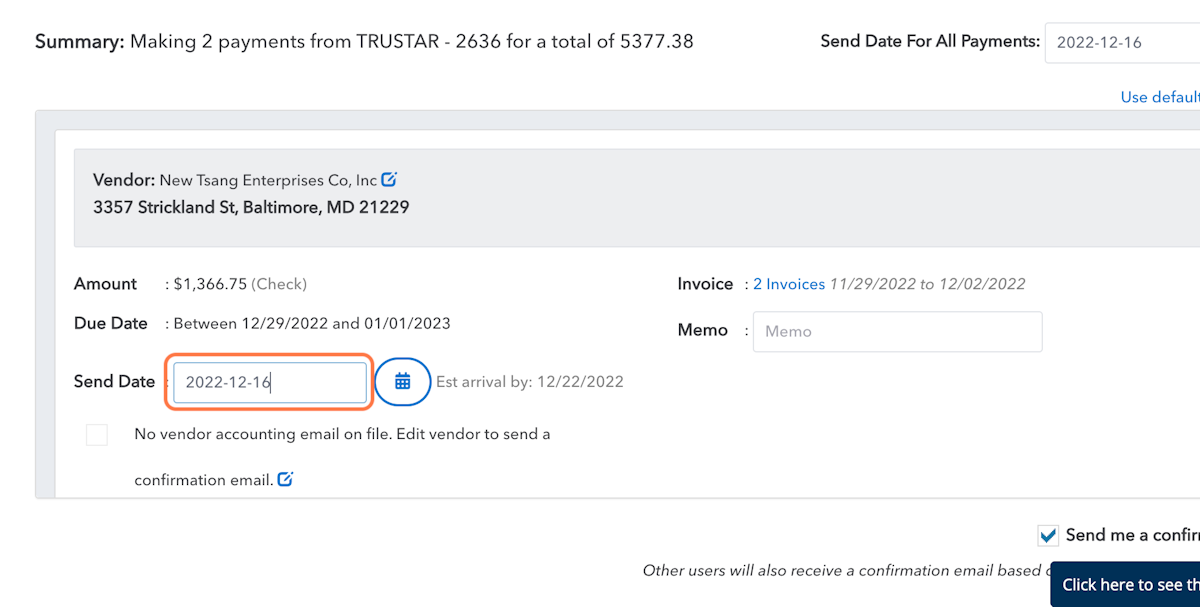
- You can also see next to the amount how this will be paid, either via a physical check or an electronic payment.
- When there are two payments to the same vendor, we will combine those automatically into one payment. If you want to double check what's included in this payment, Click on they hyperlinked "2 Invoices" text.
-
Below this you can also add a memo to the payment.
Note that the memo gets printed on a physical check but is not included in remittance info to the vendor and it does not export to accounting.

5. You have two options for email confirmation (as shown by the arrows in the image below):
#1: this checkbox allows you to send the vendor an email confirmation when the payment processes (vendor email address must be entered when configuring the vendor under "Settings")
#2 this check box shows you will receive a confirmation email, it's checked by default
Learn more here: Confirmation Email Settings for Bill Pay
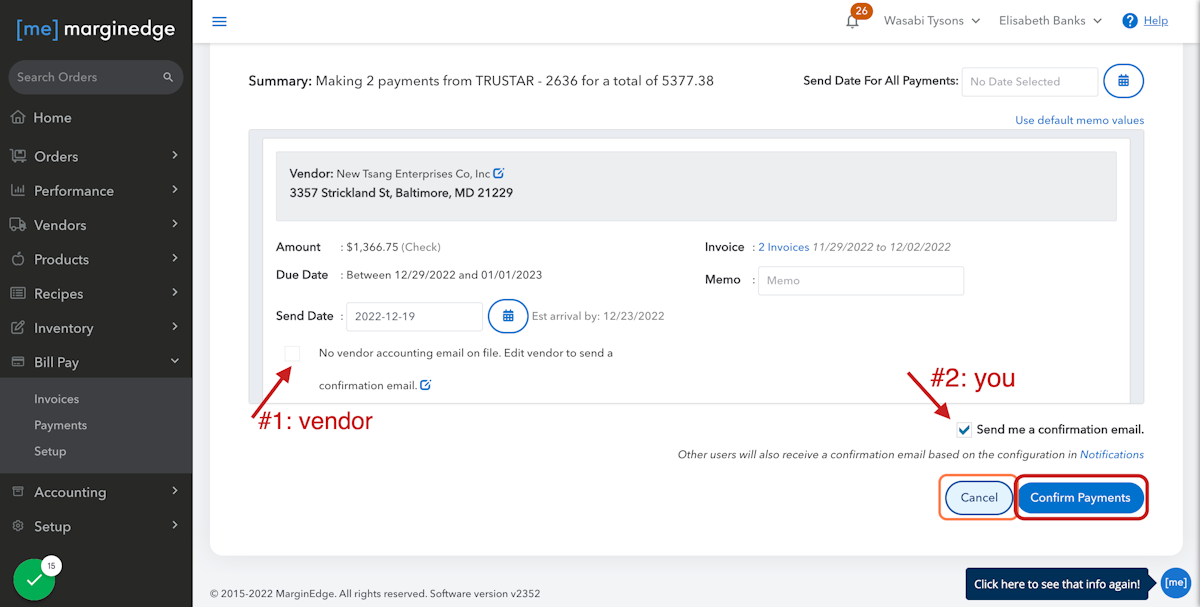
6. Don't forget to click CONFIRM PAYMENTS when finished!
(Or cancel out if you need to make any changes before confirming.)
Other things you can do though [me] Bill Pay
Mark bills as having been paid outside of MarginEdge
If you see invoices on your Bill Pay screen that you've already paid outside of ME Bill Pay, you can remove them from your Bill Pay Invoices screen by selecting these invoices, clicking on Other Actions at the top right of the screen, then clicking Mark as Paid Externally. This will change the status for the selected invoices from "Unpaid" to "Paid Externally", removing it from the default Bill Pay Invoices screen view.
Marking something as "Paid Externally" does not change the Payment Account on the invoice and will not change anything about the exported data on the invoice - if the invoice was originally closed to A/P, it will still export that way and show as unpaid. This feature only exists to allow you to quickly filter it out of your Bill Pay view. Remember that any invoice originally closed to any Payment Account other than A/P automatically gets the Bill Pay status of "Paid Externally" and won't show up in your view. Since the default view filter does not include these invoices, they will be hidden by default.
If you want to change the Payment Account so that it will send the correct payment information to your accounting system, there is information about that here: Changing the Payment Account on a Closed Invoice
If for any reason you have an invoice marked as “Paid Externally” but later decide you want to pay it through Bill Pay, you'll need to change the status of the invoice from "Paid Externally" to "Unpaid." To do this, adjust your Bill Pay Invoices screen filter to include "Paid Externally", select the invoice you'd like to mark as "Unpaid", then click on Other Actions at the top right of the screen and click Mark as Unpaid button. You will now be able to see and pay the invoice from your Bill Pay Invoices screen.
View Images of Payments that are ‘Pending’ or have been Sent
To see your payments, go to Bill Pay > Payments. On the Payments screen, you will see any bills for the given date range that are either awaiting processing or that have been paid.
Use the date selector to change the range of payment dates you want to review and select the payments you want to view.
If you want to see a copy of the payment that was sent, select “View Payments” button, then click "Payment Only":
If you want to also see the associated invoices for review, select the payment, click the “View Payments” button, then click "Payment and Backup Documents". (Remember, we do not send copies of invoices along with the payments.)
NOTE: This is not a true copy of the payment. It's generated using the information currently on file and all sensitive information is removed - you will not see bank account numbers or signatures and if the address has been updated since the payment was sent, you will see the current address.
Download copies of checks to send to vendors
Full article with video here: Downloading eCheck PDFs
Sometimes vendors will ask for a PDF of the actual check for them to mobile deposit - for example, if a check is held up in the mail or is overdue and you want to rush it to them. You can download a PDF of the check (an "eCheck") from the `View Payments` menu.
To avoid duplicate checks, if the check has not already been printed and mailed, downloading the eCheck will mark the check as "Sent" and it will not be physically printed and mailed. If the check already been printed and mailed, you can still download it, there will be a pop-up telling you that it has been downloaded and to mindful of the potential for duplicates.
NOTE: This is a valid check and includes all necessary account numbers and signatures. Please use caution when saving and distributing this document.
Export Data for Positive Pay
If your bank requires you to submit this in order to process any external payments, you can quickly create a file from within [me].
From Bill Pay > Payments, select any number of payments and click "Export as" then select "Export Checks for Positive Pay. This will generate standard templated CSV file you can use for Positive Pay.
The file includes the following data: Send Date / Recipient / Payment # / Amount
Company IDs for Positive Pay
If your bank account leverages Positive Pay, or maintains a list of vendors who are approved to debit your account, please ensure that our Company IDs are a part of their record. You may be able to do this through your online banking portal, or by contacting your bank representative.
MarginEdge's Company IDs are:
CEOD486019
ACHD486019
