Before taking an inventory, you'll first need to set up your Count Sheets. If you do not already have your count sheets set up, check out this article on the topic.
IMPORTANT: Do not take inventory in Chrome's Incognito mode!
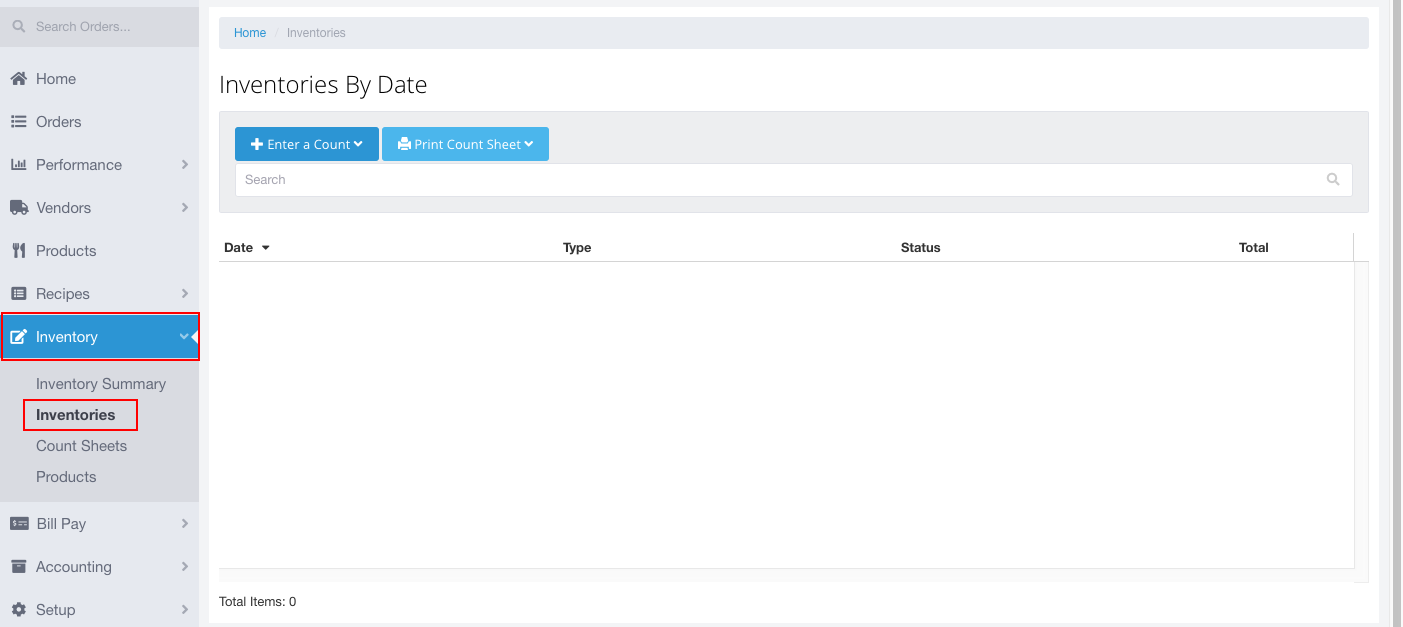
To begin taking an inventory, as shown in the image- click Inventory in the left navigation menu bar, and then from the dropdown, select ‘Inventories’- you will be redirected to Inventory By Date screen.
Click on the ‘+Enter a Count’ as shown in the following image:
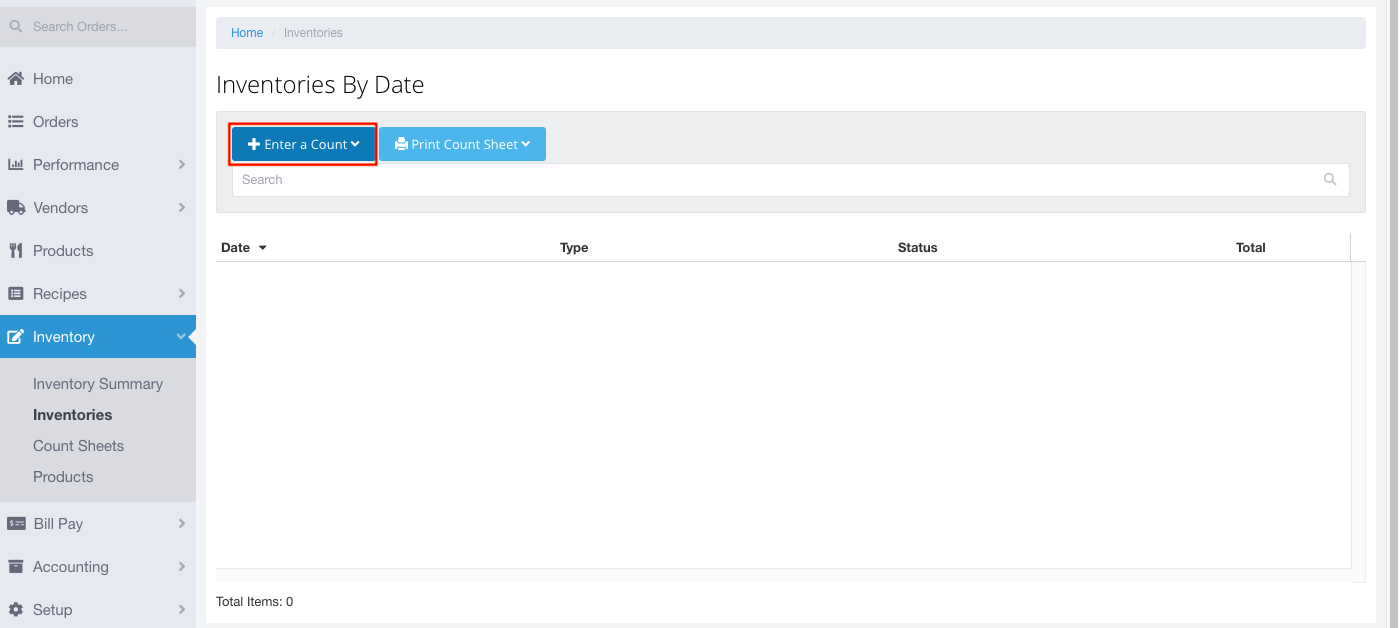
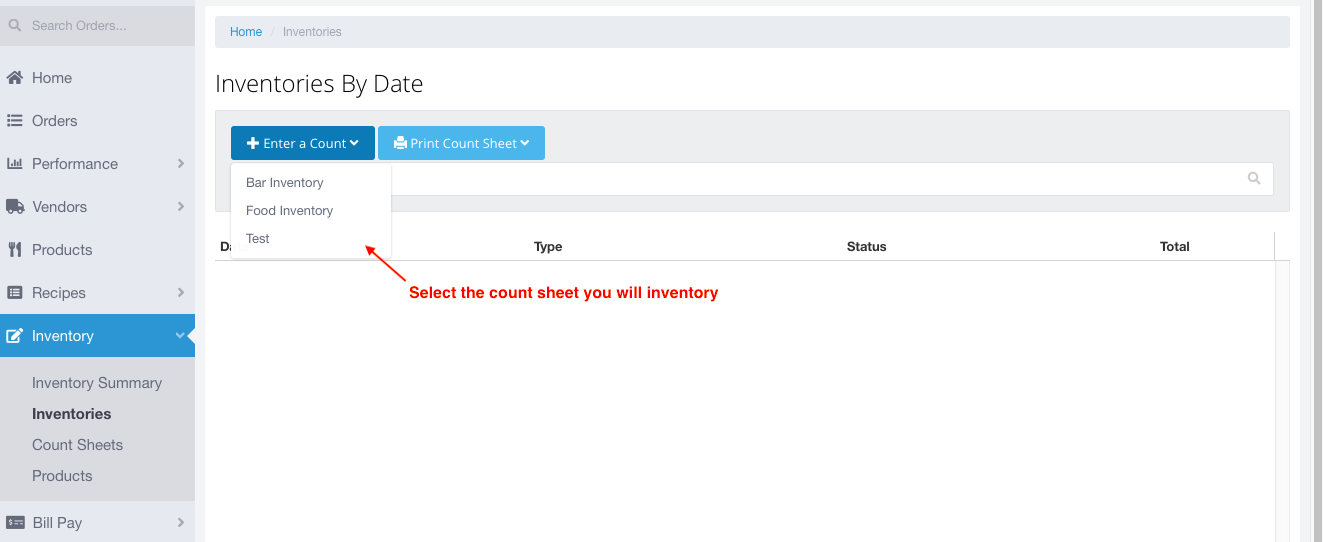
When you click on ‘+Enter a Count’, you will see a list of dropdown options. The dropdown list are the count sheets that you have already created. (The count sheets are the templates you use to take inventory.)
Select the count sheet that you will inventory. For this example, we will select Test Inventory from the dropdown list.
Note: Only one person at a time can be in MarginEdge on a particular count sheet taking inventory. However, if you have multiple count sheets such as Food, Bar etc, someone can be taking inventory on each one of those at the same time.
Next, we will select the date. When entering new counts into MarginEdge, you will be prompted to enter a date.
To ensure your inventory matches your sales data it is essential that the dates are set correctly.
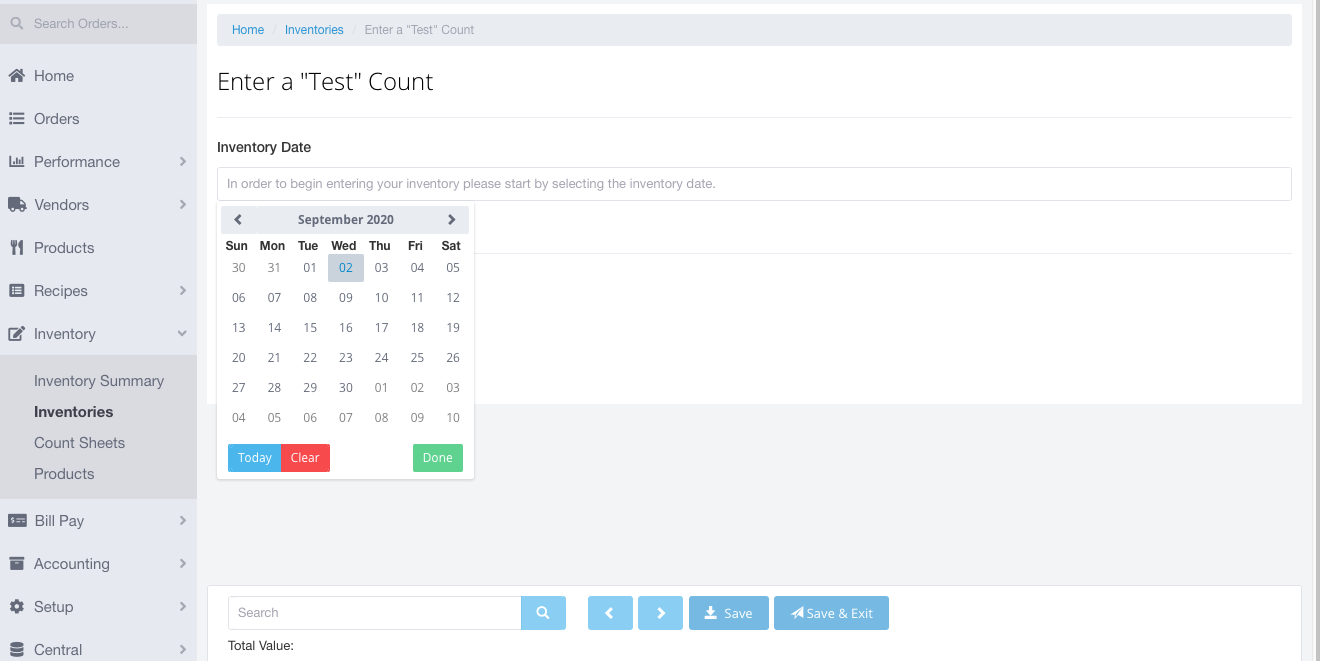
As shown in the image below, click anywhere in the box located under ‘Inventory Date’. The calendar/date dropdown will appear.
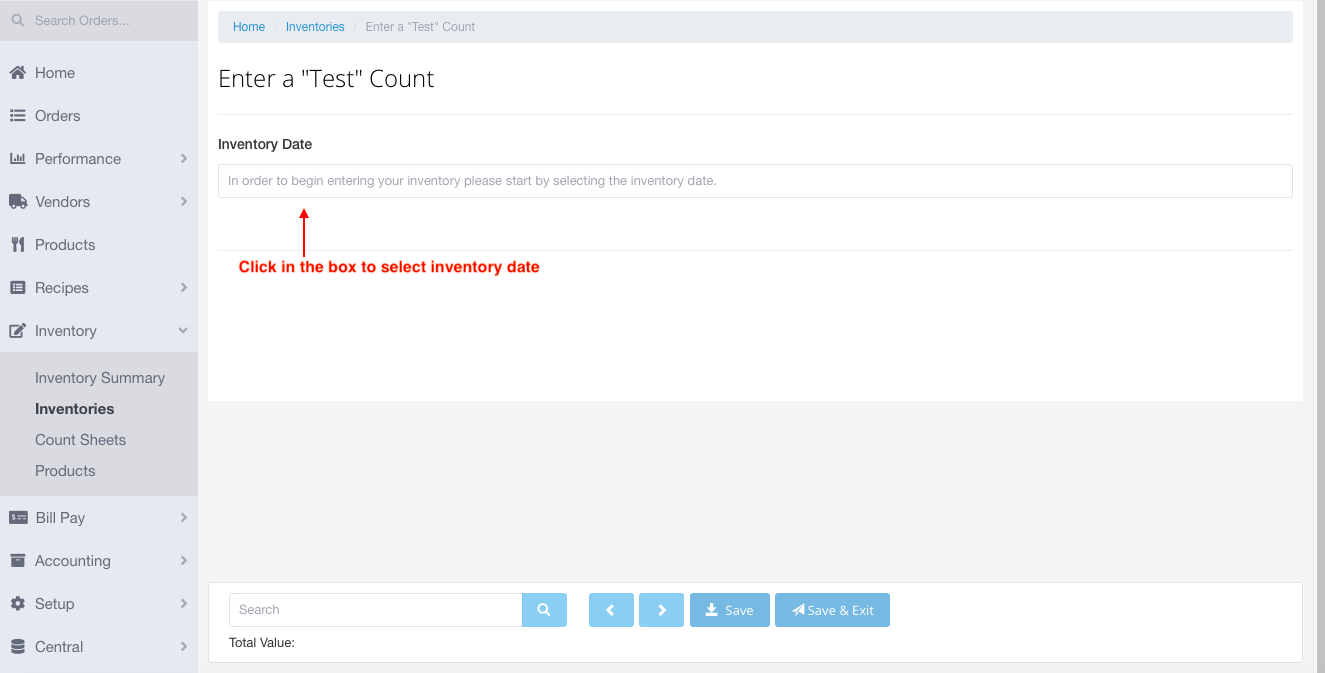
Select the date. Note, the date you enter represents the last day of business that will be included in your inventory. For this example, we are selecting 09/02/20.
You will be redirected to the Count page, in this case, ‘Test Count’.
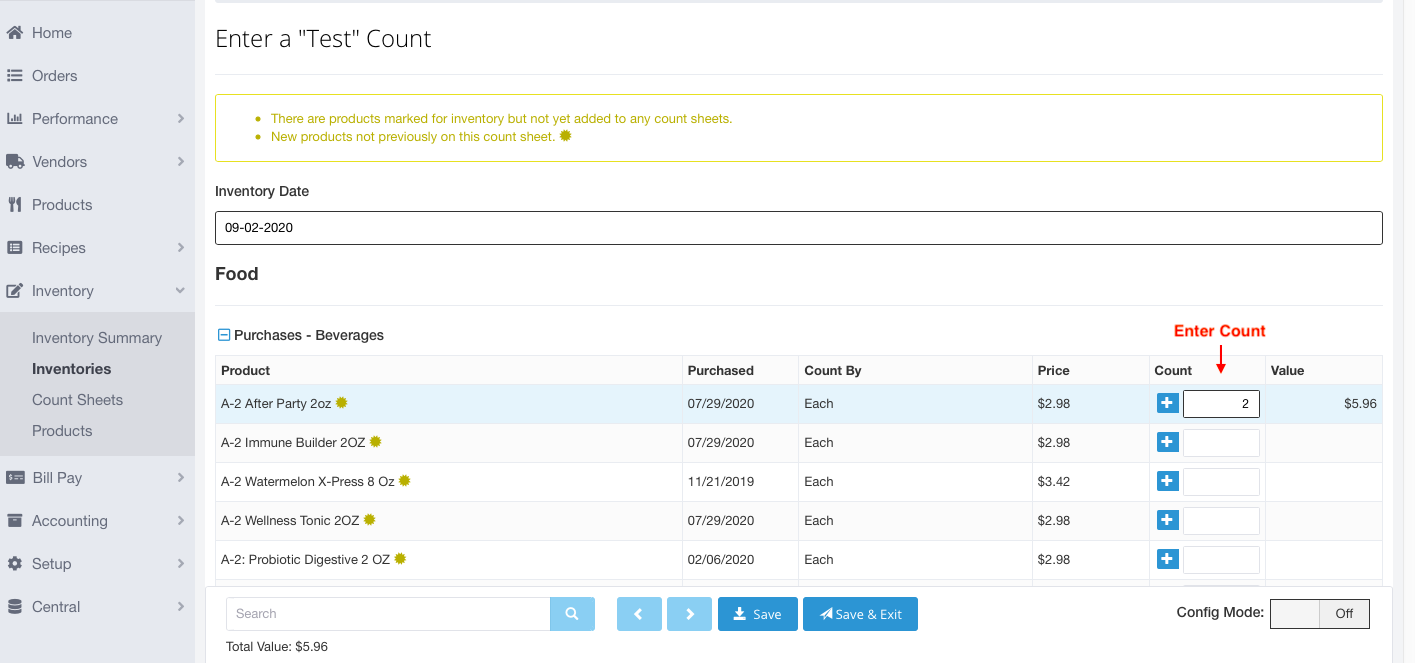
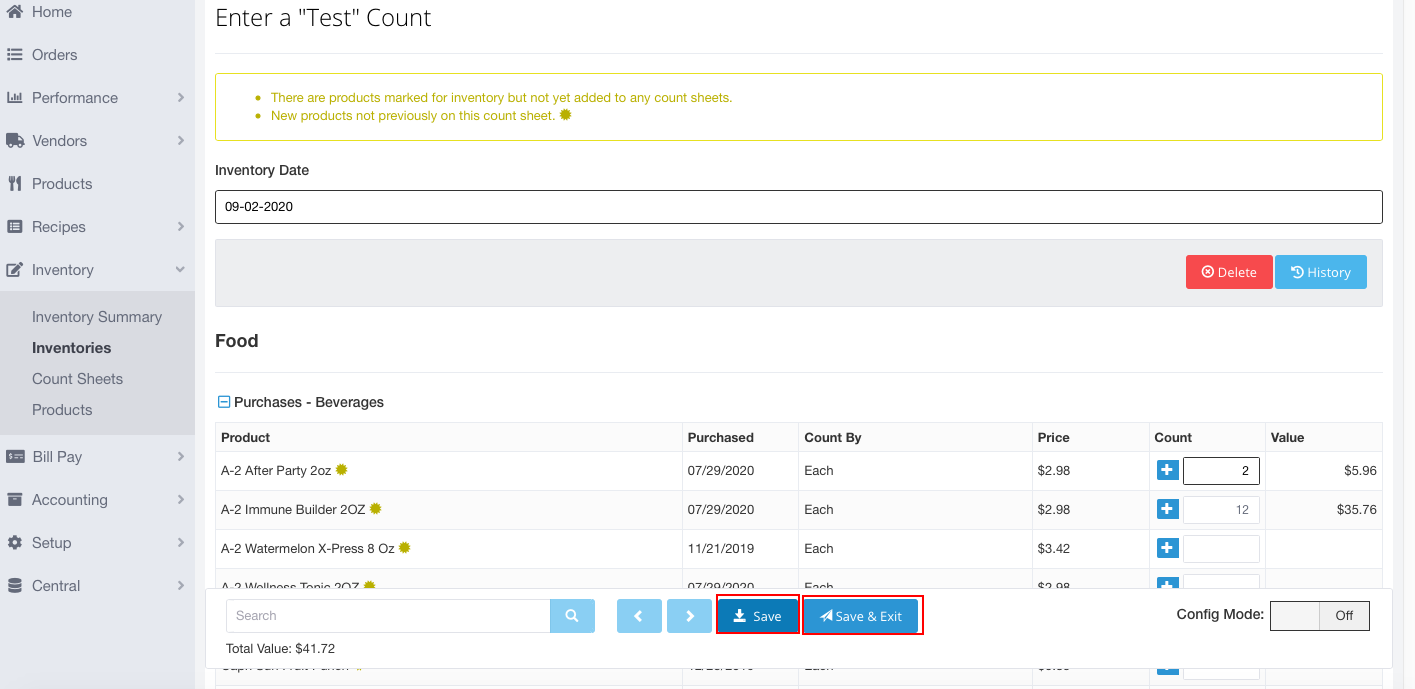
On the page titled ‘Enter a Test Count’ page, you can enter the counts. There are two ways to enter the counts-
- a) As shown in the image below, you can either type in the full count in the box
OR
- b) Click the ‘+’ sign to add to existing count.
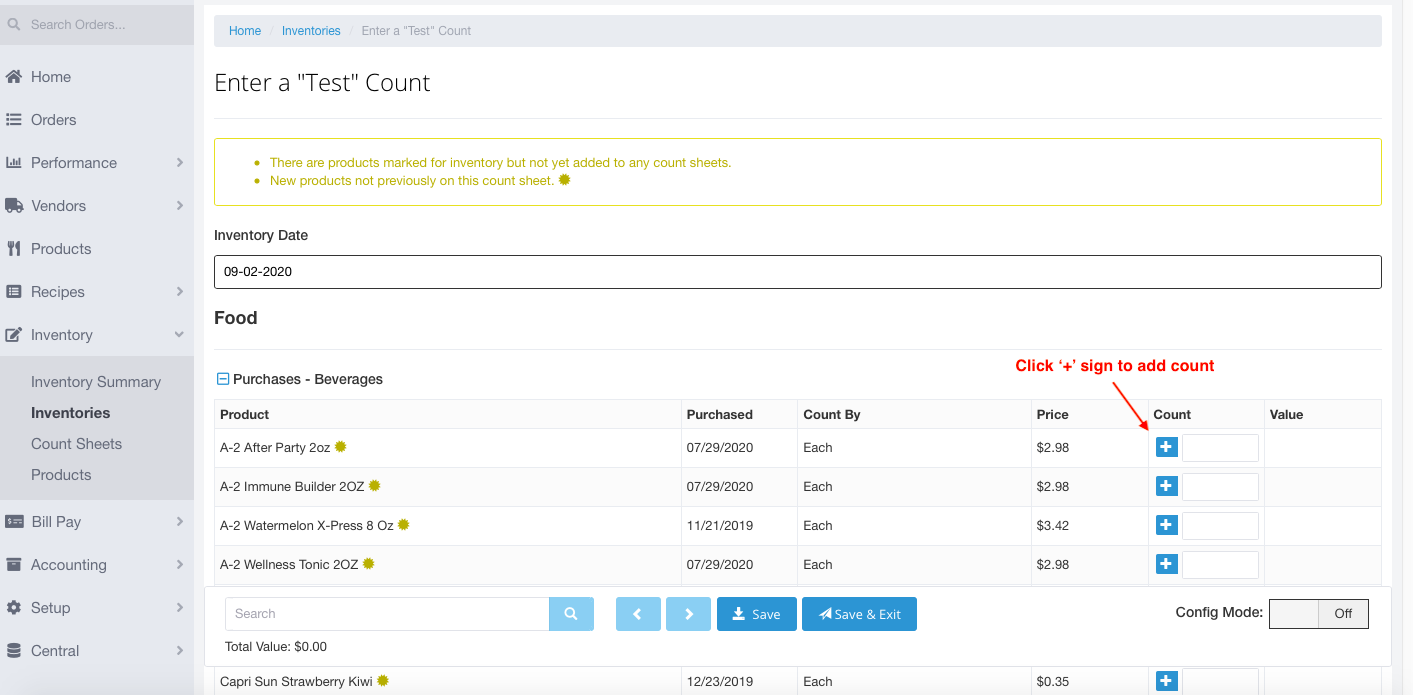
If you chose to enter the count with the ‘+’ sign, you will be redirected to ‘Add to existing Count’. As shown in the image enter the count in the boxes and click Save when you are done.
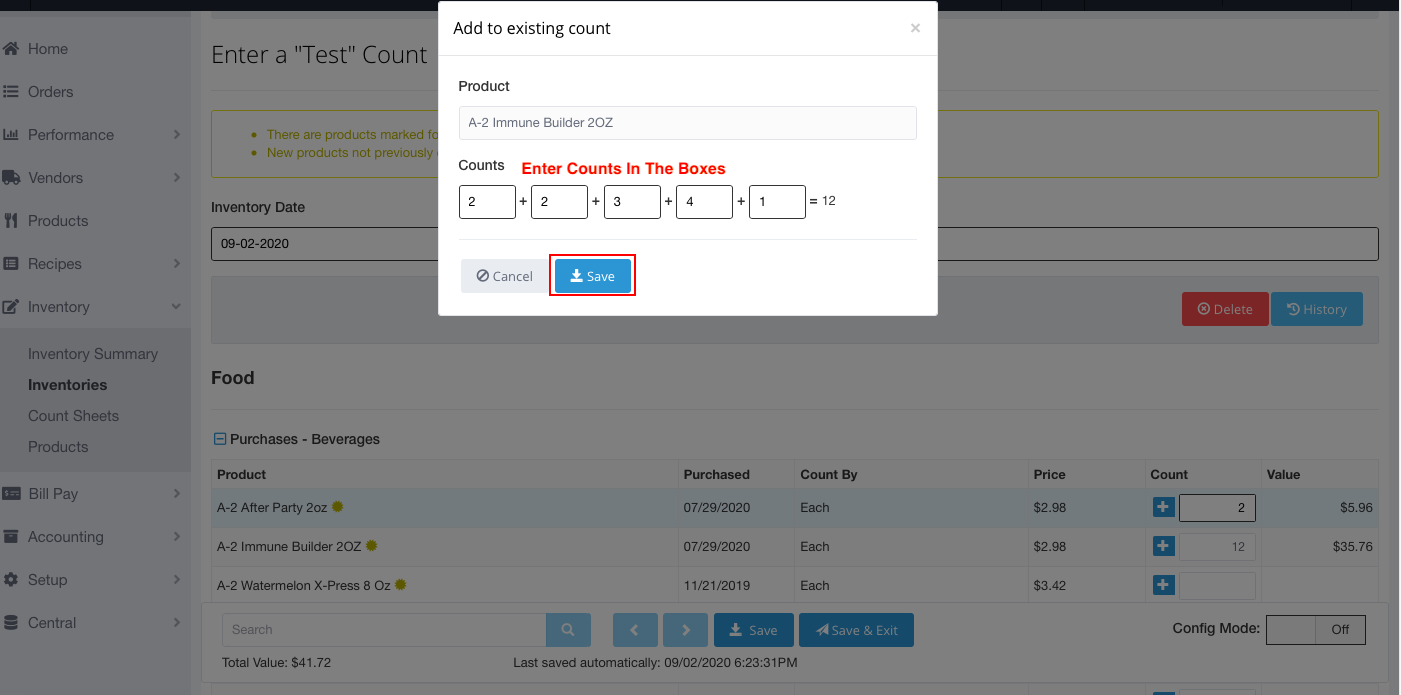
When you enter the counts the line value is calculated automatically.
Once you have entered the counts, click ‘Save’ to save your entry or click Save Exit to save and exit from the current page. If you chose to Save and Exit, you will be redirected to the Inventories by Date page.
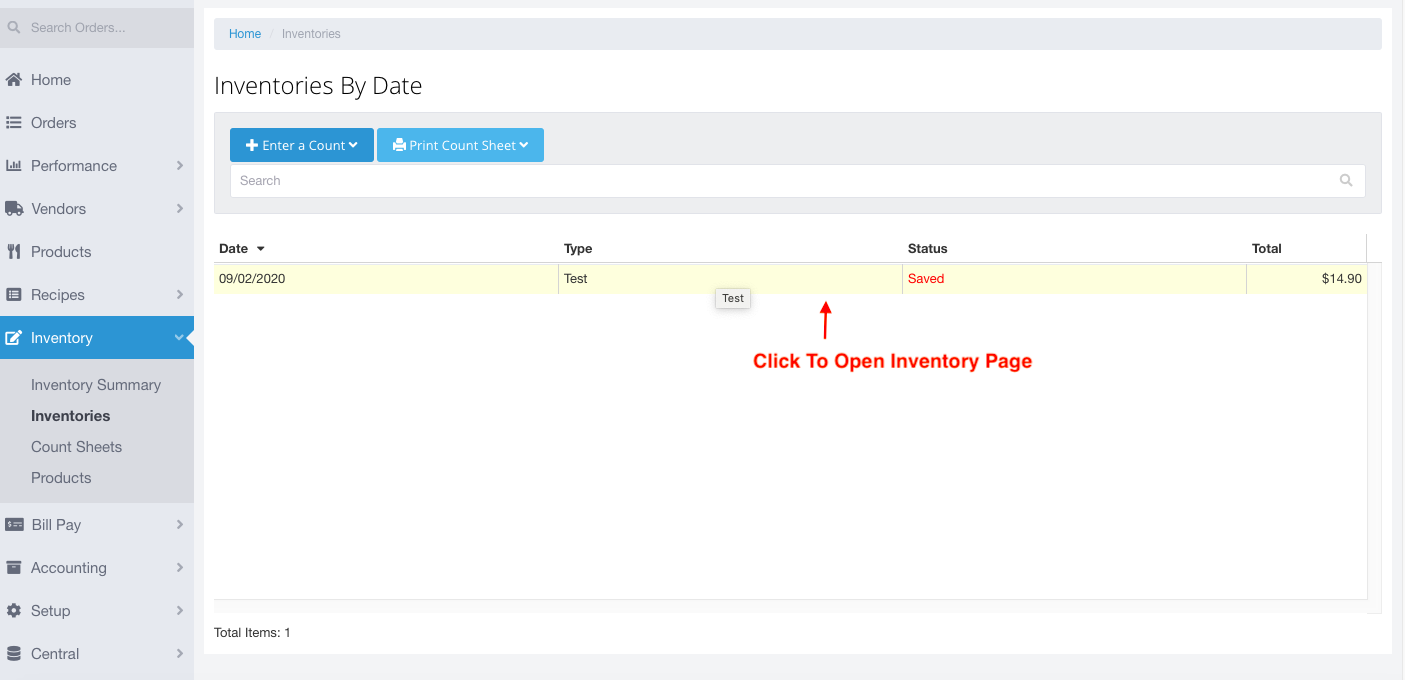
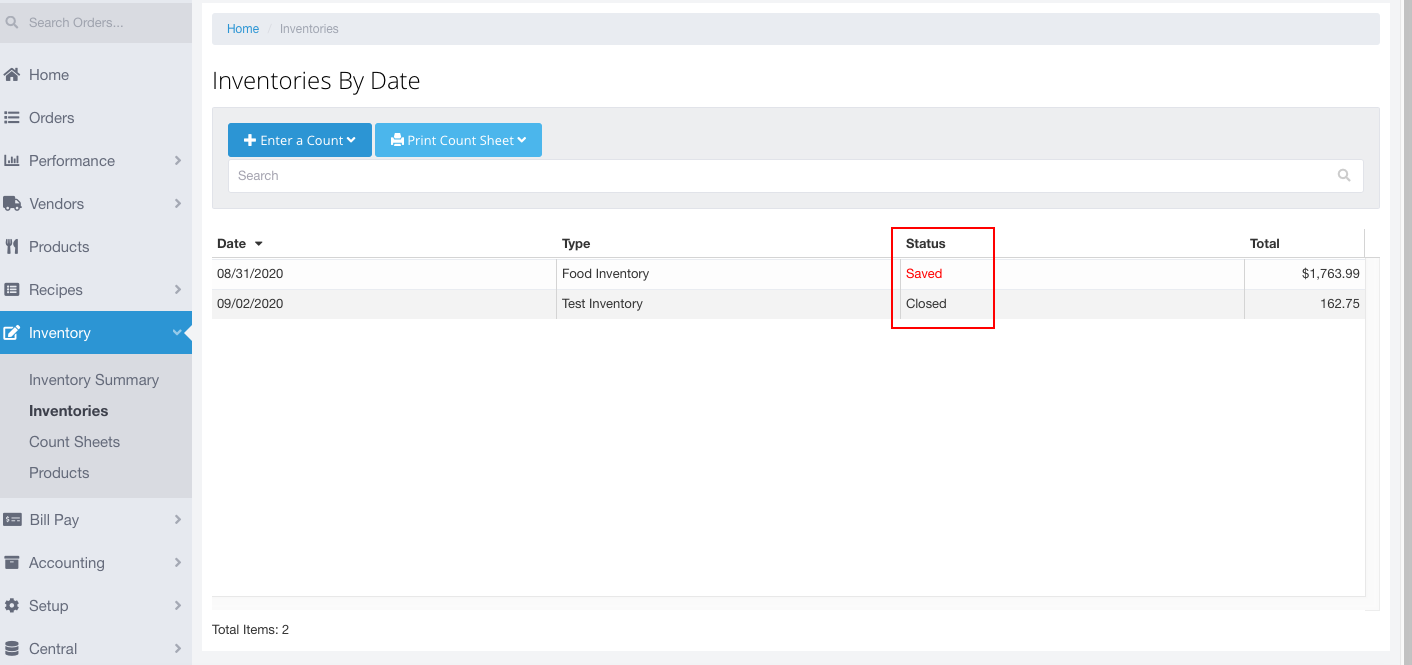
On the Inventories by Date page, you will see the newly inventoried page. This new inventory is in the Saved status but has not closed. Saved status means that you are still working on the inventory and it has not yet closed.
Note: All Inventories need to be closed in order to see Food Usage details.
From the inventories page you can click on the saved inventory and resume the counting. As shown in the image click the inventory and you will be redirected to the Inventory count screen.
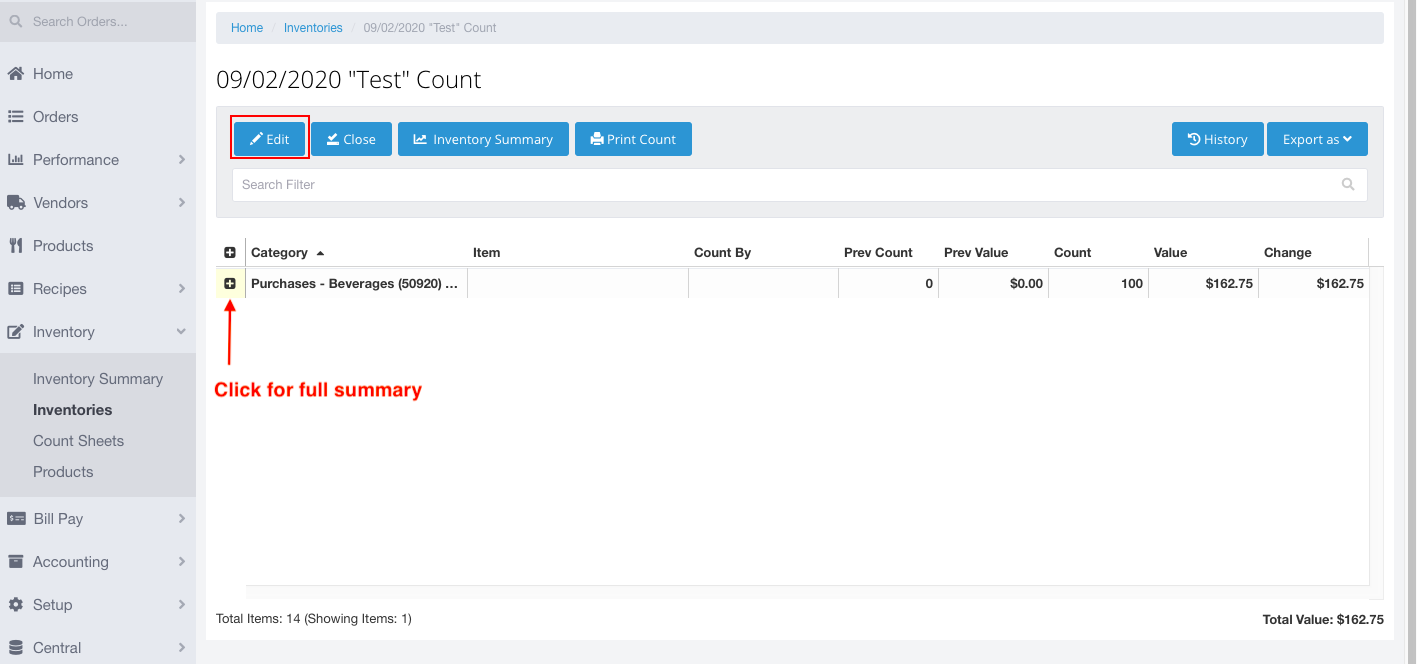
As shown in the image, you can click on the ‘+’ sign to view everything in the inventory.
If you want to Edit the Inventory, click Edit and you will be redirected to the enter inventory page which will allow you to make changes to the inventory count.
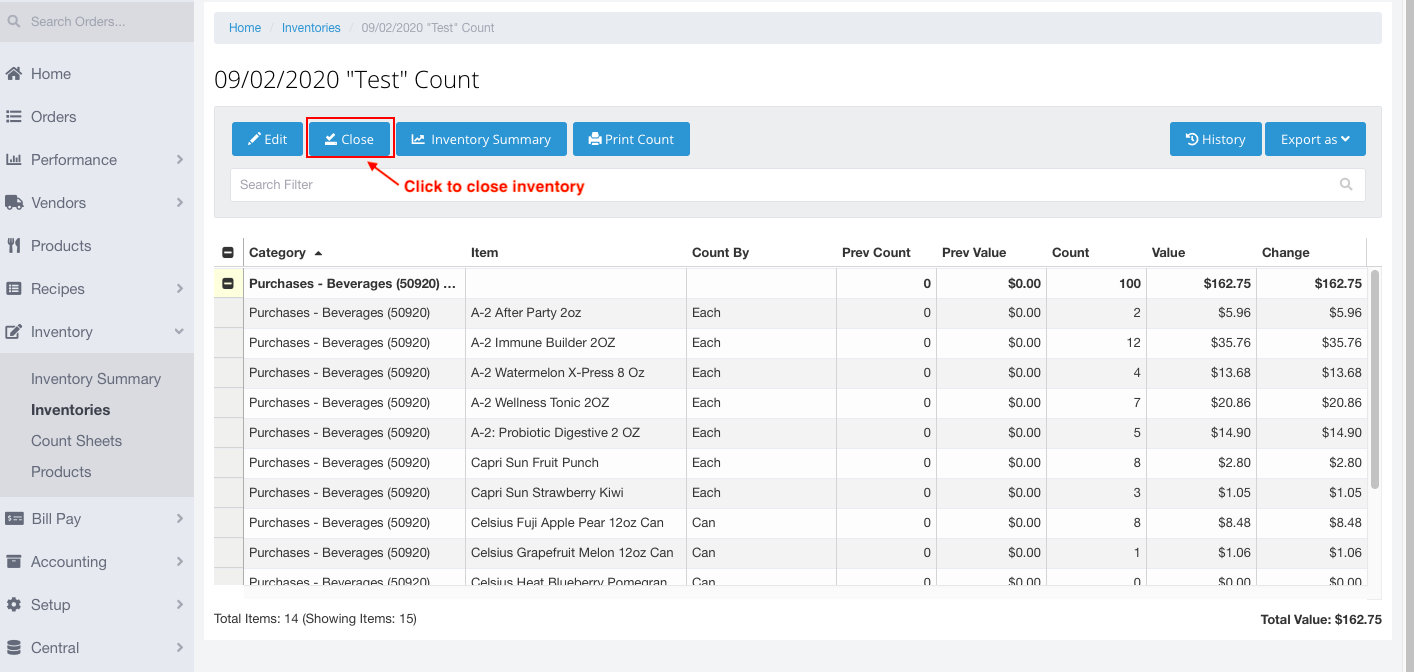
To close the inventory, as shown in the image- click Close. The inventory will close, and you will be redirected to the Inventory by Date screen.
The Inventory by Date screen shows all the inventories. The status column shows the current status of an inventory. In the following image, we can see that the Test Inventory which we have used for this example is closed and there is a Food Inventory that is in saved status.
Here is the video to taking inventory: Video- Taking Inventory
