
Having Invoice Approval enabled gives you a quick and flexible way to make changes to both your invoices and the products associated with those invoices before they are closed. Below you'll find instructions regarding how to navigate the Invoice Approval workflow from a computer. To use Invoice Approval in your Mobile App, see this article: Invoice Approval in the Mobile App.
Here's some of what you can do through this feature:
- Control the flow of what requires approval in the settings
- See the invoice image side-by-side with the [me] coding
- Adjust the date, invoice number, customer number or payment account
- View the data as individual line items or as category summaries
- One-click to adjust a product's category
- Quickly spot check the highlighted new vendor items & products
- Make adjustments to a vendor item's quantity or price
- Create a credit when adjusting for items not received
ℹ️ Invoice Approval User Permissions
Users with Accountant or Admin roles can approve invoices. An add-on “Invoice Approval Manager” role can be assigned to any user who does not need Accountant or Admin access. See the role guide for more details.
Article contents
Click any link below to jump straight to the section you need!
- Video: Making Edits to Your Invoices
- Step-by-step visual walk through
- Making edits during invoice approval
- Adjusting your approval settings
Video: making edits to your invoices from the invoice approval screen
A visual walk through
Approving invoices
To approve an invoice from the website, go to Orders > Invoice Approval in the Navigation Menu.
A search bar is available and columns can be sorted by clicking on the column header.
If you have one or more invoices that don't need review but just need quick approval, you can use the checkboxes to select them and click "Approve Invoices" to process them in bulk. Note that only 10 invoices can be done at one time when using the bulk approval feature.
Click on any order number to start the review process.
Reviewing invoice details
You'll see the invoice image in a side-by-side view with the order itself:
The various VIEWING options from this screen:
(1) You can can easily scroll back and forth between the invoices a
(2) Click on the horizontal bar in the middle and drag it side to side to choose how much of your screen you want to use for displaying each section! Click the eye icon to turn off the photo viewer and just focus on the order itself.
(3) Here you can zoom in or out and rotate the image. You can also grab the image and move it around the screen.
(4) Choose your product view: either by line items or by category totals.
(5) Default view shows All Items, but you can quickly switch to view only new Vendor Items or New Products. The number shown in parentheses indicates how many of each are included on the invoice. Also note the orange sun icon highlights any new VIs or Products.
(6) Select your columns to display. Options include: Vendor Item Name, Packaging, Product, Report By Unit, Quantity, Price, Line Price Total.
And the various EDITING options:
(7) If this invoice is in the wrong unit, you can quickly make that correction using the "Move Invoice" button. And note the solid blue "Approve" button is for when you are finished reviewing it!
(8) You can edit the Invoice Number, Customer Number, Invoice Date and adjust the payment account.
(9) Clicking on the blue hyperlinked product allows you to edit the product associated with that vendor item (see instructions below)
(10) You can either Edit or Delete the line item (see instructions below)
Making edits during invoice approval
Editing a product
To edit a product, click the hyperlinked blue product name.
The following shows all editable fields for you.
For more in-depth help, see this article: Finding and Editing Your Products in MarginEdge
- Edit a product's category

- Edit the count by unit-of-measure
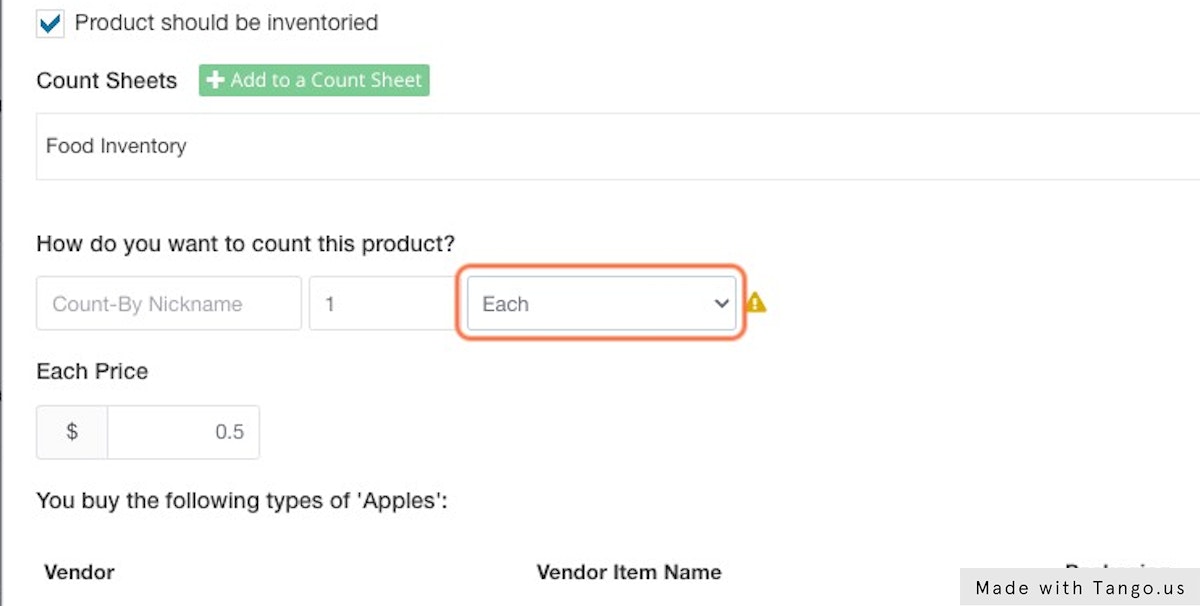
- Make a product tax exempt
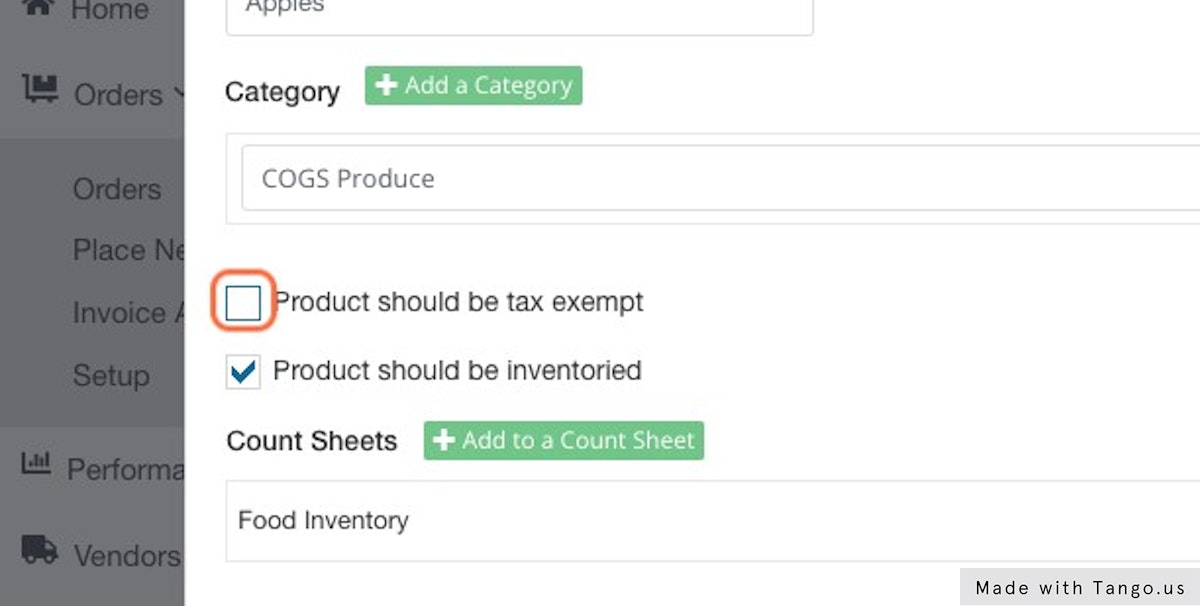
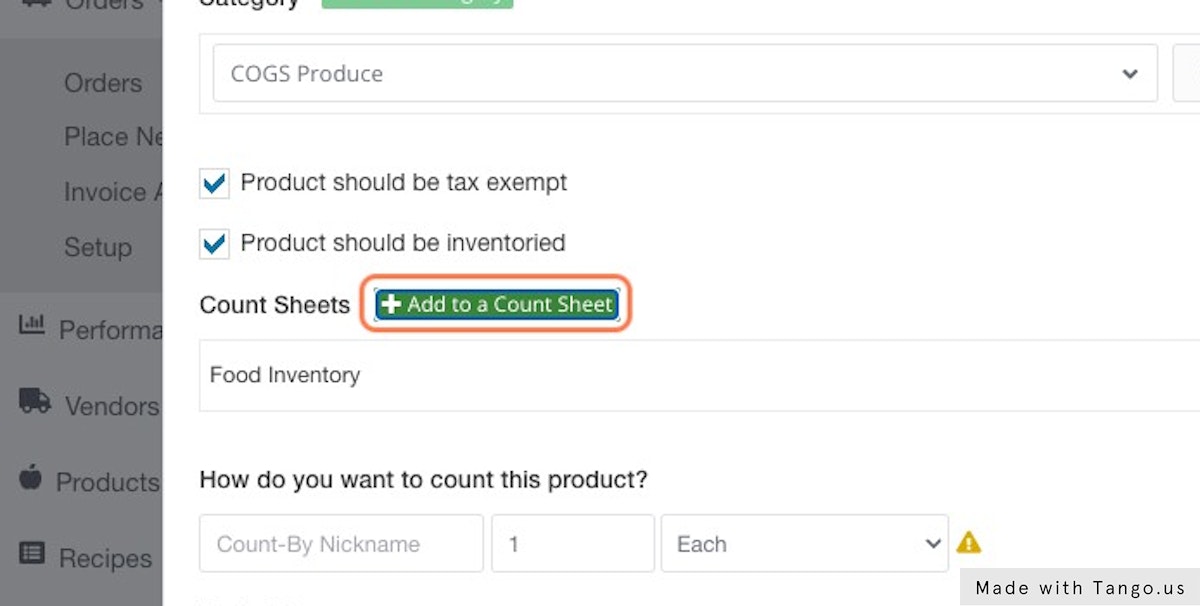
- Make a product inventoried, non-inventoried or add a product to a specific count sheet
Editing invoice line items
To edit or delete a line item, click on the three dots to the left of the vendor item name. There are multiple scenarios outlined below so please follow the one appropriate for you!
-
Edit price or correct quantity ordered - when the line item quantity or price does not match the vendor's data
-
Edit + adjust the quantity received - when you want to create an adjustment because you did not receive everything you ordered
- Delete a line item - when the line item present should not be associated with this order at all
How to edit a price or correct quantity ordered
Did we goof on getting the quantity you ordered or the price right? Note, if you need to adjust the amount you received, go to the next one!
- Click "Edit Line Item". This will allow you to adjust the quantity ordered and/or the price. Just click into the box and adjust as needed, we will calculate the new line price. Click SAVE when finished.
How to adjust the quantity received
Is the data correct regarding the amount that was ordered but what you received was different?
- Click on "Adjust quantity received". This will open up additional fields for you to fill in, allowing us to show this as an adjustment to the original invoice (meaning that we are acknowledging that a credit is due from the vendor) as opposed to it being an error from the original invoice processing. [This option is not available for any vendors set to "Skipped" for their Handwritten Adjustments.]
- If this particular vendor is set in "Combined" mode for your Handwritten Adjustments, you will eventually have a new adjusted invoice total and this is what you will see:
- If this particular vendor is set in "Separate" mode for your Handwritten Adjustments, the original invoice total will stay as is and this action will create a separate credit in MarginEdge. This is what you will see:
Once completed adjustments are made, click SAVE and you will immediately see the changes reflected on the invoice inside the Invoice Approval screen.
If your settings allowed for a separate credit to be generated, you will now see that reflected right below the line item. And when you click to "Approve" for the invoice, you will also be approving this new credit!
How to delete a line item
Is there just an erroneous line item that should not be associated with this order? This is when you should just delete it.
Instead of choosing "Edit", choose "Delete" from the drop-down menu. A box will pop up to confirm your choice. (You also have the chance to click to create a credit if you meant to adjust the amount received instead of remove the item completely.)
Adjusting your approval settings
You can only change your invoice approval settings from the website. To adjust your settings, go to Order > Invoice Approval and click on "Invoice Approval Setup."
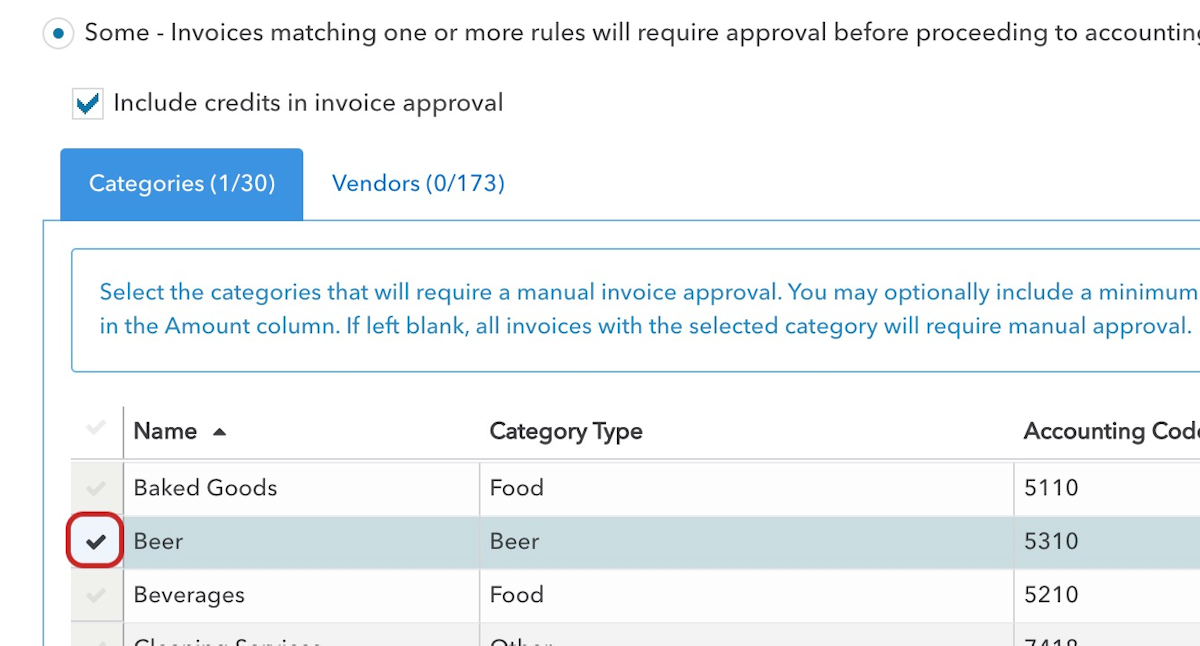
You have the choice to enable this for ALL invoices, or select "Some" to set up rules.
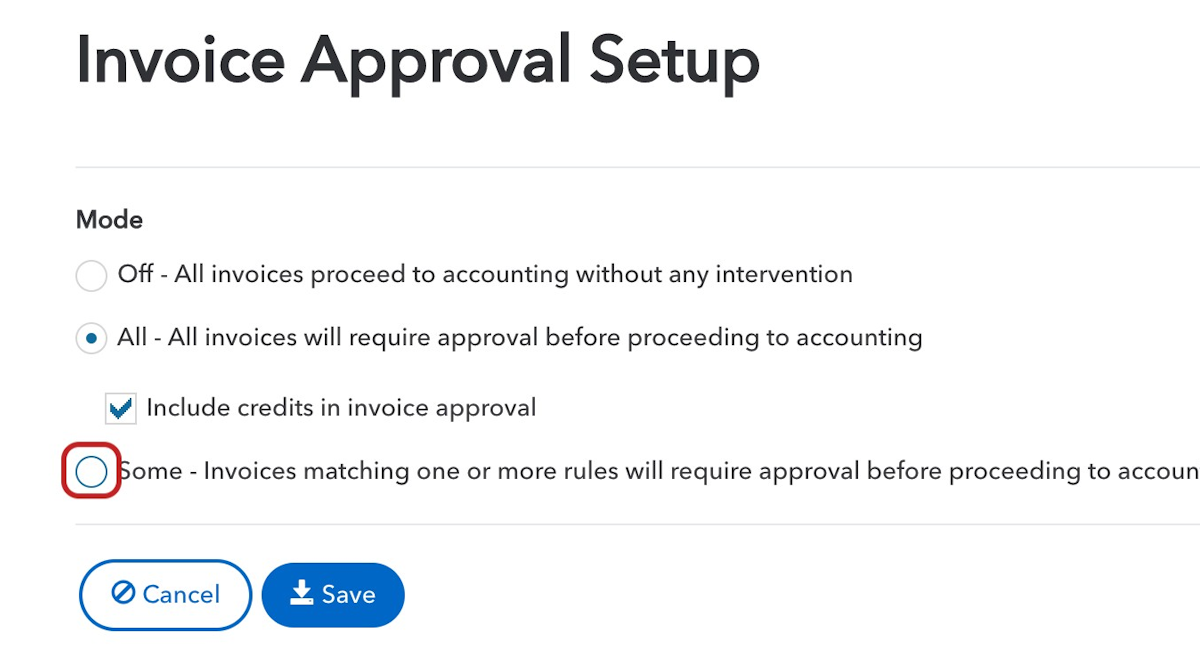
For example, you can limit it to just certain categories or vendors.
More details can be found here: Setting Up Invoice Approval
When finished, be sure to save it!
